
Manual can seam Teardown Process
Conducting a can seam inspection is a thorough process that requires specific steps to be followed in order to achieve accurate double seam measurements. By achieving these accurate results, your company can ensure quality product is being sold.
Let’s walk through how to conduct a manual teardown of a can seam:
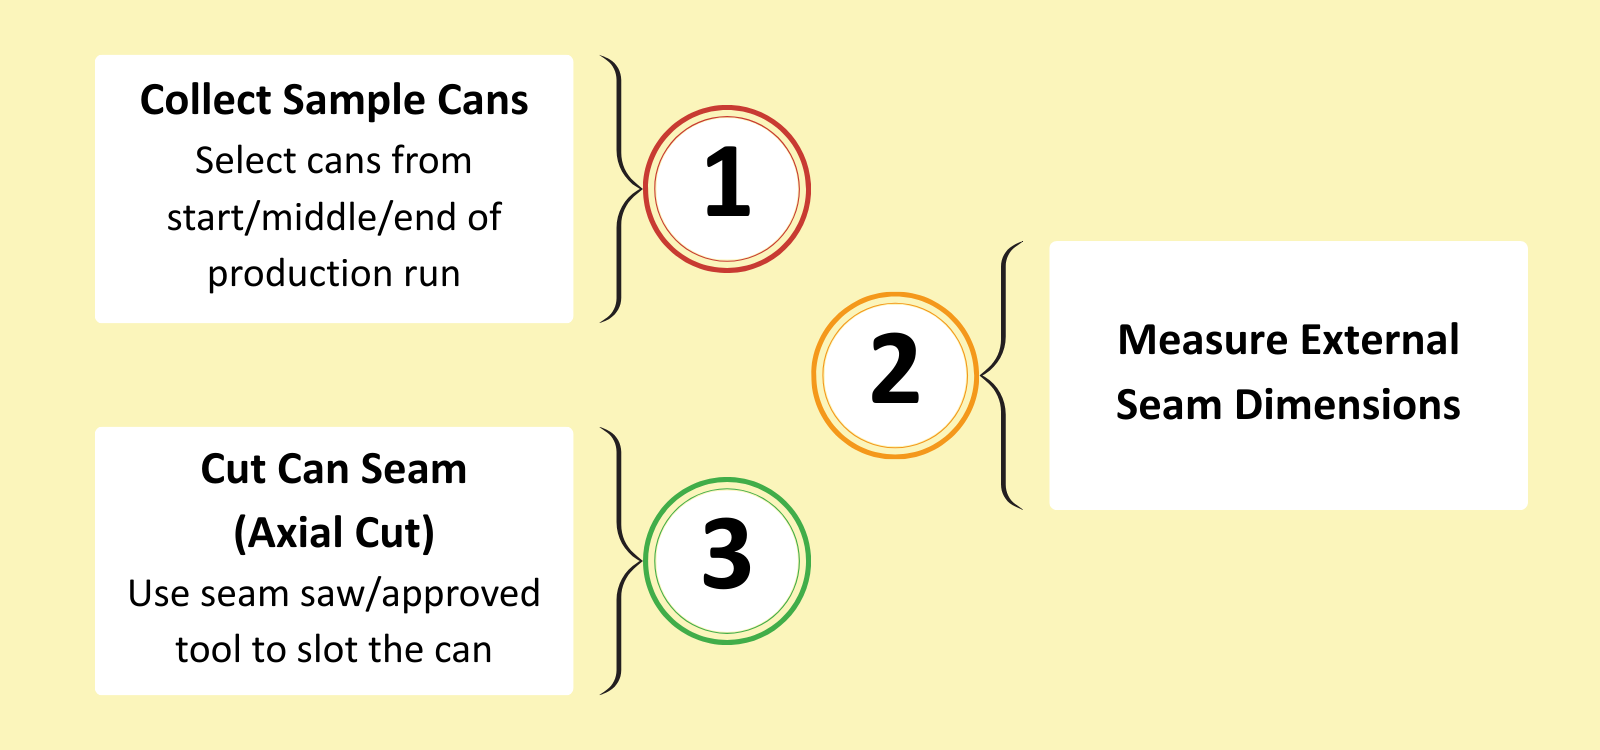
Manual Takedown Steps 1-3
Step 1 - Collect Sample Cans
Collect cans to serve as samples for the can seam inspection. During production, it is recommended that cans be collected and tested during the Start, Middle and End of a production run to obtain an accurate sample size and distribution of that batch. Can maker guidelines should also be followed when deciding how often to check can seams. It is common practice for breweries to test 5-10 cans per shift, testing more during startup and after any seamer adjustments are made.
Step 2 - Measure External Seam Dimensions
For each can, measure the following dimensions:
Seam Height
Seam Thickness
Countersink Depth
Make sure to record all dimensions within an inspection log.


Step 3 - Cut Can Seam
Using either a seam saw or approved cutting tool, cut vertically through the double seam. A file can also be used to file down the top of the can for lid separation. Make sure to not to damage the body of the can during the cut.

Manual Takedown Steps 4-6
Step 4 - Separate Lid & Cover Hook from Body
Gently remove the lid away from the body followed by the cover hook.
Ensure the hooks do not get distorted during separation.
Step 5 - Prepare Seam Cross-Section
Smooth and clean the cut area using a Seam Cleaning Bar to ensure good visibility of the cross-section.
Step 6 - Measure Internal Seam Dimensions
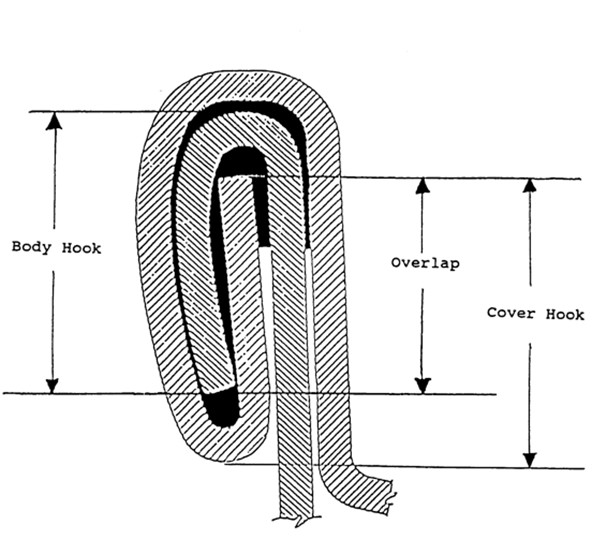
Measure the following dimensions:
Cover hook
Body hook
Overlap
Actual thickness
Assess the tightness/wrinkle rating on the cover hook in addition to the measurements.

Step 7 - Compare to Specifications
Determine if measurements are within company’s tolerance range by comparing measurements to can manufacturer or industry specifications.
Step 8 - Document Results
Record all values within an inspection log. Make sure to note any visual or measurement defects.
Step 9 - Take Corrective Action
Initiate seamer adjustments or maintenance concerns based on results of the inspection.
Always re-inspect after implementing corrections.